

Thinking about giving your garage an upgrade? Coating your garage floor might not be the first thing that comes to mind—but it can make a big difference. A good floor coating doesn’t just look sleek, it also helps protect your concrete from cracks, stains, and everyday wear and tear. Whether you use your garage for parking, projects, or storage, a durable coating can extend the life of your floor and make the whole space feel cleaner and more finished.
In this guide, we’ll walk you through everything you need to know—from the most popular types of coatings and how much they cost to installation tips and how to keep it looking great over time. Let’s dive in and help you find the best option for your garage!
Table of Contents
Benefits of Garage Floor Coating
Protects concrete from stains, cracks, and moisture
Your garage floor takes a beating. Between oil drips, muddy tires, dropped tools, and damp weather, it’s no wonder bare concrete starts to show its age fast. A good floor coating acts like a shield, sealing the surface so moisture doesn’t seep in and cause cracks or mold. Plus, it makes cleanup a breeze.
Improves appearance and brightness
Garage floors aren’t exactly known for being pretty, but a fresh coating can change that. Whether you go for a sleek, high-gloss finish or a textured look with decorative flakes, coating your floor instantly makes the space feel cleaner and more polished. Some coatings even reflect light, which can help brighten up a dark garage without needing to add more lighting.
Increases resale value and reduces maintenance
Believe it or not, potential buyers notice the garage—especially if it’s clean, organized, and looks well cared for. A coated floor gives the impression that the whole home has been maintained, which can boost curb appeal and resale value. On top of that, you’ll spend less time scrubbing stains, patching cracks, or dealing with dust since the coating helps keep everything sealed and tidy.
Popular Types of Garage Floor Coatings
Actual costs depend on your location, project scope, and materials. The best way to know what you'll pay is to get quotes from local contractors.
Get Your Free Estimate →Epoxy Coating
Epoxy is probably the most popular garage floor coating—and for good reason. It’s super durable, resists chemicals like oil and antifreeze, and can handle heavy foot and vehicle traffic. Plus, it looks great. You can choose from tons of finishes, including solid colors, metallics, and even decorative flakes that add texture and style. Just keep in mind: epoxy takes a bit of time to apply and cure, so it’s not something you can rush.
Polyurea/Polyaspartic Coating
Think of polyurea and polyaspartic coatings as the next level up from epoxy. They’re incredibly strong, flexible, and designed to handle serious wear and tear—perfect for busy garages or workshops.
One of the biggest perks? These coatings cure fast, often in just a day, and they’re UV-resistant, so they won’t yellow or fade if your garage gets a lot of sun. They cost more than epoxy but tend to last longer and require less maintenance over time.
Concrete Stain or Paint
If you’re on a budget or just want a quick refresh, concrete stain or paint can be a great DIY option. It’s definitely more affordable and easy to apply with a roller, but it doesn’t offer the same level of protection or durability as epoxy or polyurea. Over time, you might see some peeling or wear, especially in high-traffic areas. Still, if your garage doesn’t see a ton of action, it can be a solid short-term fix.
Acrylic Sealer
Acrylic sealer is like a clear topcoat for your garage floor. It gives the concrete a nice glossy look and offers some protection from dust, moisture, and light stains. It’s best for garages that aren’t used heavily—think storage spaces or occasional parking. It’s also a quick and easy way to boost your garage’s appearance without breaking the bank.
"We matched with a great contractor the same day. The whole process was easy and completely free."
DIY vs. Professional Installation
Cost comparison and timeline
Going the DIY route can definitely save you money upfront. A basic DIY epoxy kit from a home improvement store might run you a few hundred bucks, depending on the size of your garage. Professional installations, on the other hand, can range from $1,500 to $5,000 or more, especially if you’re going with high-end materials like polyurea or polyaspartic coatings.
But with that higher cost comes a faster turnaround—pros can usually get the job done in a day or two, while DIY projects might take an entire weekend (or longer) when you factor in prep, application, and drying time.
Tools and skills required for DIY
If you’re the hands-on type and don’t mind a bit of hard work, DIY coating can be totally doable. Just know that prep is key. You’ll need to clean and degrease the floor, fill any cracks, and maybe even etch or grind the concrete to make sure the coating sticks properly. This means you might be renting equipment like a floor grinder or pressure washer. You’ll also need tools like rollers, squeegees, and mixing buckets—and be ready to follow the instructions closely to avoid bubbling, peeling, or uneven coverage.
When to hire a pro for best results
If your garage has a lot of cracks, moisture issues, or old coatings to remove, hiring a pro is probably your best bet. They have the right tools, materials, and experience to handle tricky surfaces and ensure a long-lasting, high-quality finish.
Pros also know how to apply coatings quickly and evenly, which can be especially important with fast-curing products like polyaspartic. Plus, many professional installations come with warranties, so you’ve got some peace of mind if anything goes wrong down the road.
Surface Preparation and Application Process
Importance of proper surface prep
Before you even think about cracking open that coating kit, surface prep is a must. It might not be the most exciting part, but skipping it is the number one reason garage floor coatings fail. You want a clean, dry, and slightly rough surface so the coating can bond properly. That means sweeping up all the dust, scrubbing away oil stains, and removing any old paint or sealer.
If your floor has cracks or chips, you’ll need to patch those up, too. For epoxy coatings, etching (usually with a mild acid wash) helps open up the surface so it can really grab onto the concrete. If you’re using polyurea or hiring a pro, they’ll likely use a floor grinder for even better adhesion.
Step-by-step application overview for epoxy and polyurea coatings
Once the prep work is done, it’s time to coat! Here’s how it generally goes:
- Step 1: Mix the product – Whether it’s epoxy or polyurea, you’ll usually mix two parts together (resin and hardener). Be ready to work fast, especially with polyurea—it sets quickly.
- Step 2: Cut in the edges – Use a brush to apply the coating around the perimeter and corners of the garage.
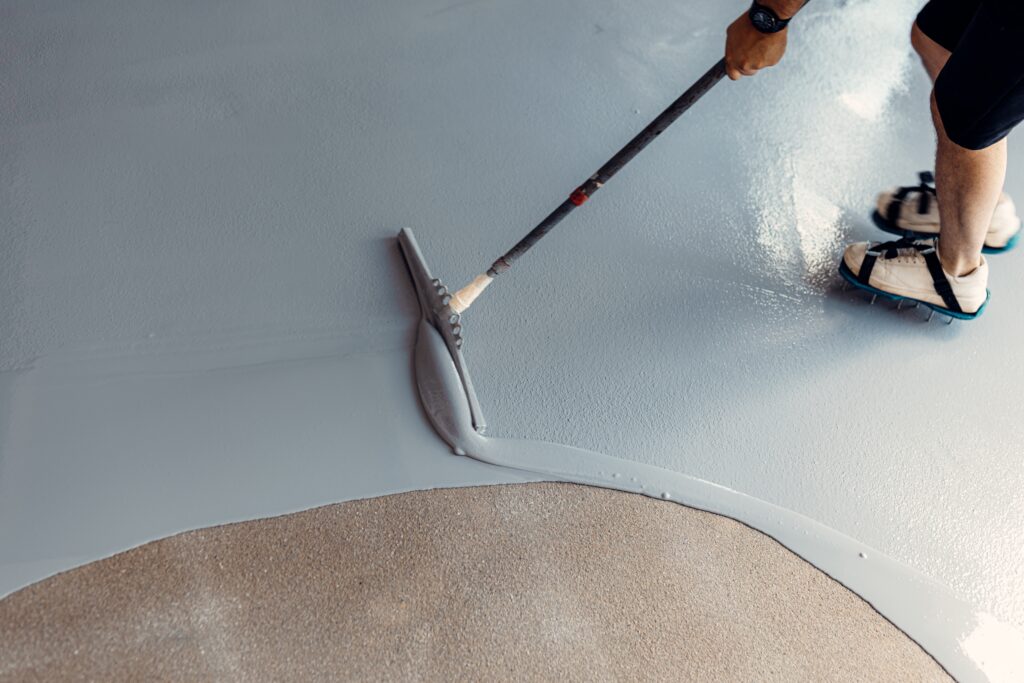
- Step 3: Roll it out – Pour the coating onto the floor in sections and roll it out with a long-handled roller. Try to work in small areas to keep it even and prevent lines.
- Step 4: Add flakes (optional) – If you’re going for that speckled look, now’s the time to sprinkle in decorative chips while the base coat is still wet.
- Step 5: Apply a topcoat – Once the base layer cures, you can add a clear topcoat for extra durability and shine (especially with polyurea or premium epoxy kits).
Why Hire a Licensed Professional
- Licensed & insured — protects you from liability
- Warranty coverage — manufacturers require pro installation
- Code compliance — avoids permit issues
- Faster completion — pros finish in days, not weeks
Dry time and curing expectations
This part depends on what type of coating you’re using. Epoxy usually takes about 24 hours to dry to the touch and 3–5 days to fully cure before you can park your car on it. Polyurea and polyaspartic coatings dry fast—some are ready for light foot traffic in just a couple of hours and cars in 24 hours.
Just make sure to follow the instructions on your product, and try to avoid walking or dragging anything heavy across the surface until it’s fully cured. Trust us, it’s worth the wait.
Garage Floor Coating Costs
Average price per square foot for different materials
So how much is this going to cost you? It really depends on what kind of coating you go with. Here’s a ballpark breakdown:
- Epoxy coatings usually run between $3 to $7 per square foot. Basic DIY kits might be on the lower end, while pro-grade epoxy installations cost more.
- Polyurea or polyaspartic coatings are a bit fancier and more durable, so you’re looking at $5 to $12 per square foot—but they often last longer and require less maintenance.
- Concrete paint or stain is the cheapest option at around $1 to $3 per square foot, but keep in mind you may have to reapply it more frequently.
If you’ve got a standard two-car garage (about 400–500 square feet), expect to spend anywhere from $300 for a DIY paint job to $5,000+ for a high-end pro installation.
Labor and material cost breakdown
When you hire a pro, the cost is usually split between materials and labor. Labor can account for 40–60% of the total price, depending on your location and the complexity of the job. Pros bring in heavy-duty grinders, industrial-grade products, and years of experience, so while the upfront cost is higher, the finish tends to be smoother and more durable.
DIYers will mainly pay for materials: the coating itself, patching compounds, cleaners, rollers, brushes, and maybe even equipment rentals like a floor grinder or pressure washer. It adds up quickly, but it’s still generally cheaper than hiring out—if you’re up for the work.
Additional costs (prep, topcoats, decorative flakes)
Don’t forget about the extras—they can sneak up on your budget. You might need to buy:
- Concrete cleaners or degreasers to prep the surface
- Crack filler or patching compounds for damaged areas
- Decorative flakes if you want that textured, speckled look (adds grip and style)
- Topcoats for added protection and gloss (especially with flake systems or high-end finishes)
Also, some coatings require multiple layers, so you might need more product than you think. It’s always a good idea to pad your budget by 10–20% just in case.
DIY vs. Professional: At a Glance
Maintenance and Longevity
Cleaning tips to extend the life of your coating
Garage floor coatings are pretty low-maintenance. But a little regular care goes a long way in keeping your floor looking sharp. Just sweep or use a leaf blower to clear out dust and dirt every so often—especially if you track in a lot of grit.
For deeper cleans, a mop with warm water and a mild, non-abrasive cleaner will do the trick. If you’ve got a hose or pressure washer, that works great too—just don’t blast it on full power at close range.
If you notice any oil or chemical spills, clean them up sooner rather than later. Even though coatings like epoxy and polyurea are chemical-resistant, long exposure can wear them down over time. And during winter? Toss a mat down to catch road salt and snow—it’ll protect your coating and help keep things tidy.
How long each type of coating typically lasts
How long your coating lasts really depends on the type you chose and how much wear it gets. Here’s a general idea:
- Epoxy coatings usually last around 5 to 10 years, sometimes longer with proper care.
- Polyurea and polyaspartic coatings are more heavy-duty and can last 10 to 20+ years with minimal upkeep.
- Concrete paints or stains tend to show wear faster—1 to 3 years is typical before you need a touch-up or full redo.
Of course, how you use your garage matters too. If it’s more of a home gym or storage area, your coating will probably last longer than if you’re rolling in heavy vehicles or running a full-time workshop.
Signs it’s time to recoat or replace
Not sure if your garage floor is due for a refresh? Here are a few telltale signs:
- The finish looks dull, faded, or discolored
- You’re seeing chips, cracks, or peeling areas
- The coating feels rough or flaky underfoot
- You’re having a harder time cleaning stains or spills
If you catch these issues early, a simple recoat might do the trick. But if the damage is widespread, it could be time to strip the old layer and start fresh. Either way, staying on top of maintenance helps you avoid a full redo for as long as possible.
Spring and summer are the busiest seasons for home improvement projects — top-rated contractors book up fast. Lock in your estimate now before demand peaks.
Check Availability in Your Area →Common Mistakes to Avoid
Skipping prep work
Skipping proper prep is like painting over dirt. If you don’t clean, degrease, and patch up your concrete, your coating won’t stick well. That leads to peeling, bubbling, or flaking way sooner than it should. At a minimum, you need to clean the floor thoroughly, fill in cracks, and either etch or grind the surface to give the coating something to grip.
Applying coating in the wrong weather conditions
Temperature and humidity matter more than you’d think. If it’s too cold, the coating might not cure properly. Too hot or humid? It could dry too fast and end up streaky or uneven. Epoxy especially can be finicky—most products have a “sweet spot” temperature range (usually between 55–85°F).
Always check the label and aim for a clear, dry day. If your garage tends to stay humid, consider using a dehumidifier before and during the process to get better results.
Ready to Move Forward?
Tell us about your project and get matched with up to 3 pre-screened contractors. Compare quotes, check reviews, and hire with confidence.
Using low-quality materials or rushing the process
It might be tempting to grab the cheapest kit on the shelf and knock the whole job out in an afternoon—but garage floor coatings are one of those projects where you really get what you pay for.
Cheap products might not hold up to vehicle traffic or resist oil and chemicals as well as higher-quality ones. And if you rush the mixing or don’t give each layer enough time to dry, you could end up with bubbles, uneven spots, or a finish that flakes off in a few months. Take your time, follow the instructions, and invest in materials that are made to last.
Choosing the Right Coating for Your Needs
There’s no one-size-fits-all when it comes to garage floor coatings—what works great for your neighbor might not be the best fit for you. The trick is to figure out what you actually need from a coating and pick the product that matches your lifestyle, climate, and budget.
Factors to consider:
- Climate:
Live somewhere with freezing winters or super humid summers? You’ll want a coating that can handle temperature swings and moisture—polyurea is great for this, while epoxy can be a bit more sensitive to humidity during installation. - Garage Use:
Are you parking your car in there every day? Running a workshop? Or is it mostly a storage space or home gym? High-traffic garages need more durable, chemical-resistant coatings, while lighter-use areas might do just fine with concrete paint or an acrylic sealer. - Budget:
If you’re looking for something affordable and quick, DIY epoxy or concrete stain could work. But if you’ve got a little more to spend and want a pro-level finish that lasts for years, polyaspartic coatings are worth the splurge. - Aesthetics:
Want that clean, glossy, showroom look? Go for epoxy or polyurea with decorative flakes and a topcoat. Prefer a more natural, matte finish? Concrete stain might be your style.
No matter what coating you choose, the key is matching the product to your needs—not just going for the trendiest option or the cheapest one. Think about how you use your garage now, and how you want to use it in the future, and go from there.
Conclusion
At the end of the day, coating your garage floor is one of those upgrades that looks great, feels satisfying, and actually protects your space for the long haul. Whether you’re dealing with a dusty, stained concrete slab or just want to add a polished finish to your garage, there’s a coating option that can help you get there.
From tough, long-lasting polyurea systems to budget-friendly DIY epoxy kits, you’ve got choices. And each one offers its own mix of durability, style, and price point—so it really comes down to what fits your space and goals. Maybe you need something heavy-duty that can take on daily car traffic, or maybe you’re just looking to brighten things up for a home gym or workshop.
Take a moment to think about how you use your garage, what kind of look you’re going for, and how much time and money you want to invest. Once you’ve got a handle on that, choosing the right coating gets a lot easier.